
Orange Raspberry Pi Zero 2W Basic Kit
The Raspberry Pi Foundation recently released the Raspberry Pi Zero 2W board, which has more features and advancements than the previous Raspberry Pi Zero board.
When the speeds of the Raspberry Zero boards are compared, the Raspberry Zero 2W comes out on top. It has a quad-core 64-bit ARM Cortex-A53 SoC processor with onboard 512Mb SDRAM. This is the same processor found in the Raspberry Pi 3 board. Furthermore, the raspberry pi zero w comes with heat sinks, so you don’t have to worry about the board overheating related issues.
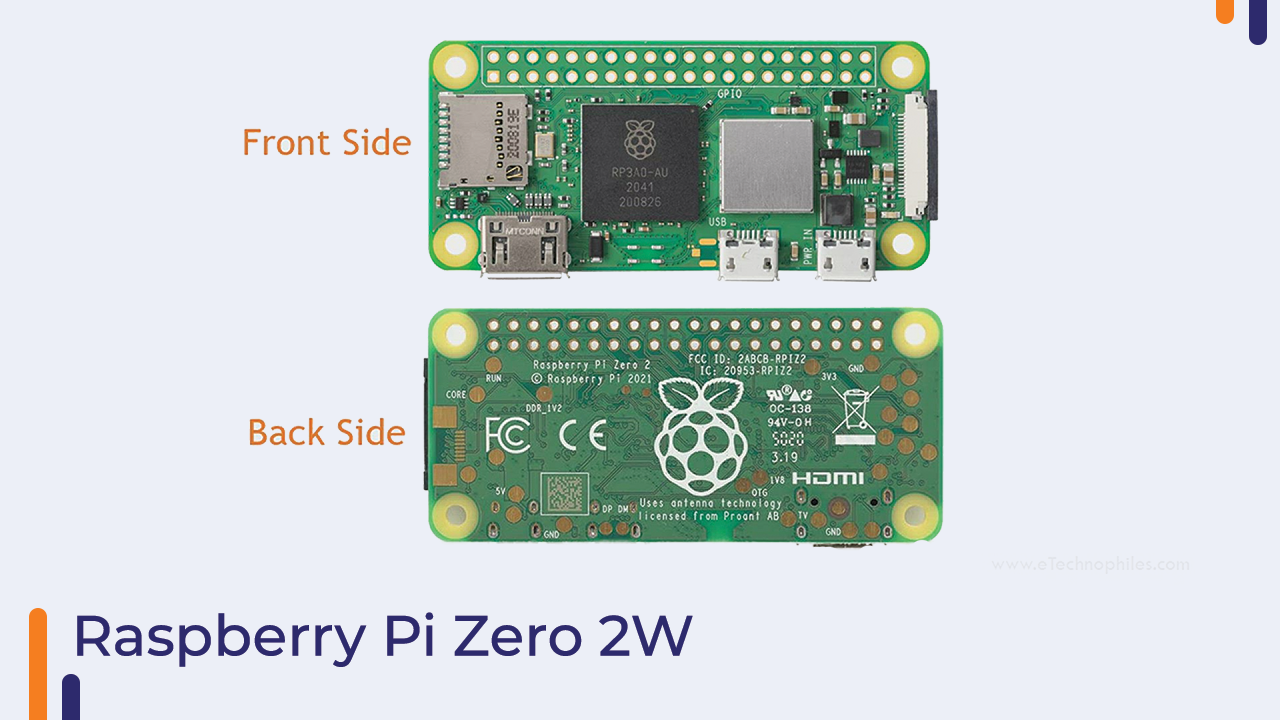
In terms of input/output ports and dimensions, the raspberry pi zero 2W board has the same dimensions as the raspberry pi zero w board and uses the same mounting holes.
In contrast to the number of ports on the raspberry pi zero w, this new raspberry pi zero 2w board includes all of the same features.
The Raspberry Pi Zero board was first released in 2015, and there have been no upgrades since then.
However, the Raspberry Pi organization recognized the importance of the small size, low power consumption, and low cost -product. Not every project necessitates the use of powerful platforms such as the Raspberry Pi 4 board.
You can now use the raspberry pi zero 2w for all of the applications that you had put off because you lacked a high-performance small-size computing module.

So that was the basic introduction to the Raspberry Pi Zero 2w board. If you have any questions, please leave them in the comments section.
In the following section, we will learn how to install the operating system on the Raspberry Pi Zero 2W.
Setting Up Your Raspberry Pi Zero 2W
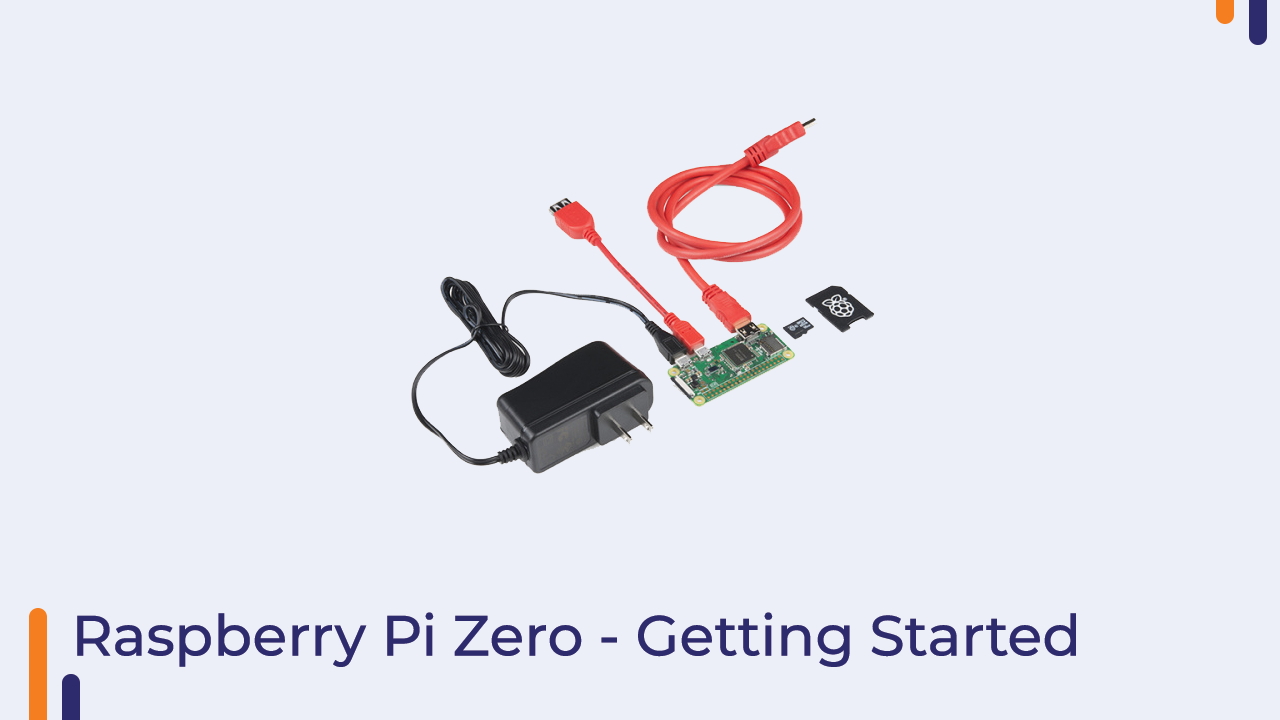
In this section, we’ll go over how to install the operating system on the Raspberry Pi Zero 2W board. To upload the OS to the board, I used the following OS and accessories. All of these components are included in the orange raspberry pi zero 2W getting starter kit.
Downloading The Raspberry Pi Zero W Compatible OS/Image
To write the image to the SD card, we use the balenaEtcher. Other image writing software, such as win32Diskimager or imgFlasher, can be used.
So, in order to write the image to the SD card, we must first install the image, which can be downloaded from this link. In addition, if you want to install another operating system, you can do so. (ADD THE LINK)
Link To Download The Latest Raspbian OS
Installing Image (Windows OS)
- Once we have downloaded the image, we can use the image writer to begin writing it to the SD card. If you haven’t already installed the balenaEtcher on your system, you can do so by clicking the link below.

- After downloading the image, launch the application and follow the steps outlined in the preceding image.
- You are now ready to perform the first boot of your Raspberry Pi Zero 2W board.
- Connect the HDMI cable to the board and the power adapter to the raspberry pi zero 2w power adapter port.
After a brief delay, your Raspberry Pi Zero 2W board will be ready for use.
Conclusion:
In this way, we learned the difference between the old raspberry pi zero 2w and the raspberry pi zero board.
In addition, we learned how to install the Raspberry Pi OS on a Raspberry Pi Zero 2w.
If you have any questions, please leave them in the comments section.


